


Spreading
Before spreading
Thorough preparation is vital if a good spreading pattern is to be achieved. High-quality fertiliser and a correctly preset spreader are other important factors in this regard. Studying the spreader manual is an essential part of this thorough preparation.
Regardless of the fertiliser being spread, the spreader settings should be adjusted to the desired spreading width and dose. Follow the guidelines below to ensure an efficient spreading process:
- Check the wearing parts such as vanes and discs;
- Check the (weather) conditions and make sure they are favourable (do not spread in wind force 3 or higher on the Beaufort scale, do not spread in gusty conditions);
- Decide on the fertiliser and do a turn-off test. When doing so, it is important to use a product suitable for the desired spreading width;
- Decide on the dose and working width to be spread;
- Make sure the spreader is securely fitted to the back of the tractor (as per manufacturer’s instructions);
- Check out the quality and physical properties of the mineral fertiliser;
- Find the right spreading chart;
- Adjust the spreader according to the spreading chart;
- Check that the machine is operating correctly;
- Check the spreading pattern by performing a spreader test;
- Adjust the spreader settings as necessary.
These guidelines have also been incorporated into a checklist.
Mounting the spreader
To achieve accurate spreading results, the spreader must be mounted correctly behind the tractor. The following issues must be addressed:
- Tractor tyre pressure: the pressure of the rear tyres should be equal so that the spreader travels horizontally/level behind the tractor;
- Stabiliser bars: the stabiliser bars on the lifting mechanism should be adjusted so that the fertiliser spreader can move about 1.5 centimetres from left to right;
- Level: the fertiliser spreader should be mounted completely level on the rear of the tractor. You can check this by using a spirit level. If the spreader is not level, adjust the lifting bars. When levelling the spreader, make sure the tractor is on level ground.
The position as seen from the side is also important. The fertiliser spreader can be moved forwards or backwards by adjusting the top bar. Usually, the fertiliser spreader should be mounted horizontally, but there are some exceptions. Refer to your spreader manual for the correct spreader position.
You should preferably use a mechanical top bar so that settings cannot change quickly. - Height: the correct height of the fertiliser spreader is described in the spreading chart or in the spreader manual. The height of the spreading disc above the crop (or soil) is the deciding factor. Also check the height of the fertiliser spreader once loaded.
Checking the spreader
Before spreading, check the following parts:
- Spreader vanes and spreader discs: these should be replaced if worn and/or containing holes. The fertiliser granules wear down the spreader vanes and discs. The vanes may be seriously damaged or even worn through (see Figure 15). This can create a hole in the vane, causing the fertiliser to leave the disc in the wrong place. This results in an irregular spreading pattern;
- Bearings: check the bearings and replace them if they show any play;
- Dispenser openings: check that both dispenser openings are the same size. You can check this, for example, with a 10 -12 mm bolt;
- Power take-off (PTO): check bearings and replace if there is excessive play. The shaft must be able to slide in and out without resistance and the protection must be in order. Lubricate the shaft regularly (see illustration);
- Adjustment options: these must be easy to operate. Spray with penetrating oil or grease where necessary;
- Displays: these must be legible. Clean or replace them where necessary.

Practical tips after mounting the spreader
After the spreader has been mounted and checked, there are still some important issues to be addressed as part of thorough preparation:
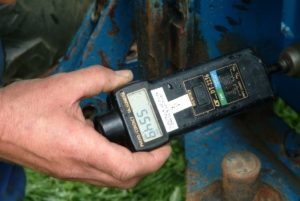
- Check the PTO speed. This is because the number of revolutions of the PTO is not equal to the number of revolutions of the spreader discs;
- Check the application rate per minute. You can do this by performing a turn-off test in the following steps:
1. Determine the application rate per minute;
2. Turn off and weigh the amount collected;
3. Determine how much this differs from the chart;
4. If necessary, check the rate again.
For specific instructions, refer to the manual.
Check the driving speed at the start. This is because the actual speed may differ from the speed indicated on the speedometer. You can check the speed as follows:
- Determine the working width and application rate;
2. Adjust the spreader as specified in the appropriate spreading chart;
3. Fill the spreader with a measured amount of fertiliser;
4. Spread over a certain distance;
5. Calculate the speed using the amount of fertiliser and the distance driven.
For example: The working width is 10 metres and the application rate 300 kg/ha. The spreader is filled with 30 kilograms of fertiliser. It is spread over a distance of 100 metres. When the spreader is empty, the speed is correct, namely 300 kg/ha: 1/10 hectare = 30 kg.
This method is reliable only if the rate per minute is correct.
- Make sure the hopper is always dry and clean when filling the spreader;
- Always cover the spreader with a tarpaulin after filling. This prevents dirt, stones and mud from contaminating the fertiliser or affecting the spreader;
- Avoid driving long distances with a full spreader as this will compress the fertiliser.
Source:
Korver, 2014.
Schriek R. v., 2012.
Roelofs, 2010.
Oene, 2014